Saturday, April 27, 2013

Comfort Food: Rice Pudding


We all have foods we identify as comfort foods.  They are different for each of us, but they tend to be things we remember from childhood.  I think anyone who grew up in the North East or near a Greek population is familiar with rice pudding.  It appears in every diner, Greek restaurant, and local dive around here.  I have always loved ordering it, although I like it better in some places than others.  I spent years trying to make my own rice pudding and never being really pleased with the results.  Some of the recipes were easy and some were multi-step nightmares.  No matter what I always felt they just didn't taste right.  I also knew in my heart these diners were not spending a huge amount of time cooking these complicated recipes.  They were throwing the left-over rice from the last few days into a pot and creating magic.  I continued to hunt and finally I struck gold.

A couple of years ago someone gave me a gift subscription to the Rachael Ray Magazine.  I have always enjoyed seeing her on T.V. and I enjoyed reading her magazine.  She had a little blurb on one page about a super easy rice pudding.  I read it and made a note of it in my mind.  The next time I had left-over rice I gave it a try.  SUCCESS!!  This was the recipe I had been looking for.  Easy and wonderful.  Then we moved and I lost the magazine.  Sigh.  I went to her website and did a search for it and, Viola!  Since Ms. Ray posts the recipe on the internet, I am going to share it with you.


Rachael Ray's Easy Rice Pudding

Ingredients

  • 3 cups milk
  • 2 cups cooked white rice
  • 1/2 cup raisins
  • 1/3 cup sugar
  • Ground cinnamon, generous pinch
  • Salt, generous pinch

Directions

  • In a saucepan, combine 3 cups milk, 2 cups cooked white rice, 1/2 cup raisins, 1/3 cup sugar and a generous pinch each ground cinnamon and salt. Bring to a boil, then lower the heat and simmer, stirring occasionally, until the milk is absorbed and the pudding is thickened, about 20 minutes. Serve warm or let cool, press plastic wrap onto the surface and refrigerate until chilled. Makes 3 1/2 cups.

I always use left-over rice when making this recipe.  Since I have usually buttered and salted the rice, I don't add extra salt to the pan.  The butter in my rice just adds another delicious layer to the recipe.


Is that not simple, or what?  I can sure see this happening in a diner kitchen.  I also love that there is very little sugar in the recipe.  One thing I disliked about many of the recipes I tried was how sweet they were.  I just don't like sickly sweet things.  You can see the raisins are mixed in with the rice already.  I didn't have a full half-cup of them today, but that doesn't matter.  If you don't like raisins, don't add them.

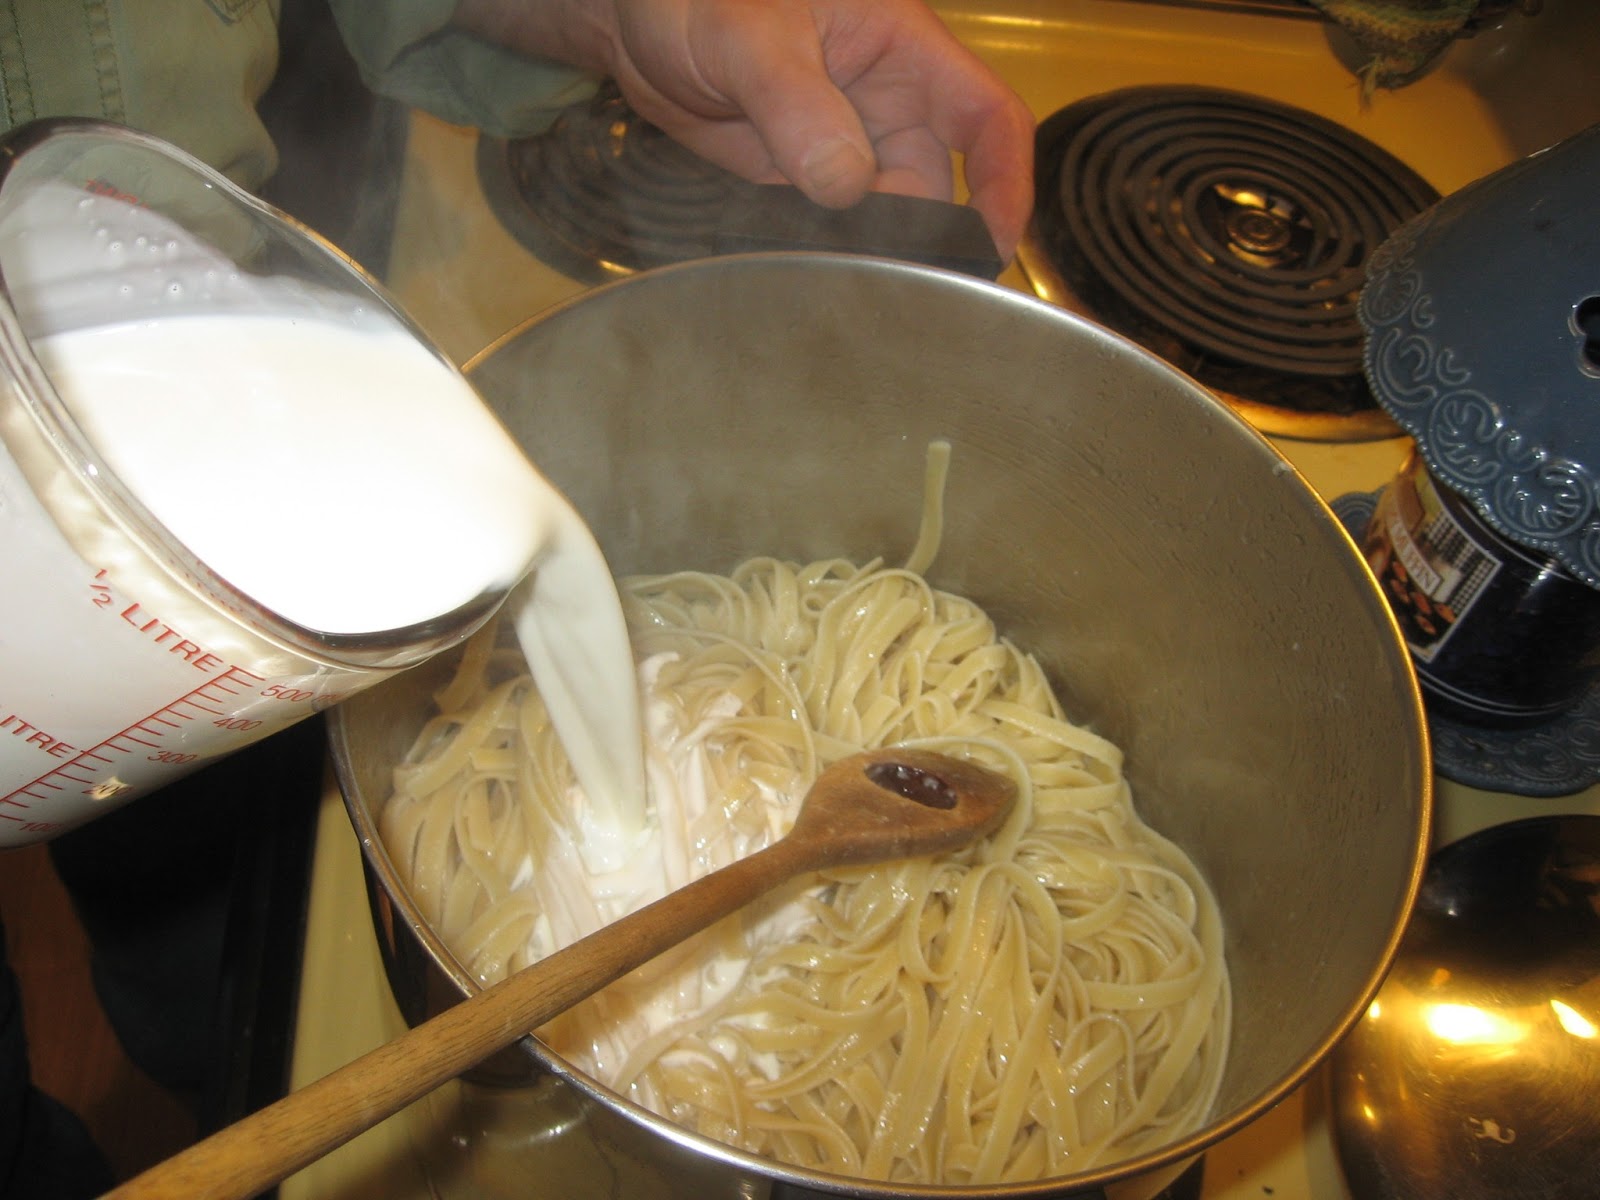
I use 2% milk because that is what I normally buy.  Low-fat milk will break and curdle much easier than whole milk.  You can avoid this in a couple of ways.  You can add a bit of heavy cream to your milk.  This ups the fat content and helps prevent curdling.  The added butter from my rice also helps.  The best thing to do is to just heat the milk slowly and only let it simmer.  Make sure to stir it every few minutes.  You shouldn't have a problem with curdling if you are gentle with the milk.

Just throw everything in together and put the burner on to Medium.


Once it starts to simmer turn the heat down to Low and stir.


As it gets closer to finishing it will need more frequent stirring to prevent burning.


You can see how it has thickened nicely.  When you stir it and can see the bottom of the pan as you pull the spoon through it, it is done.  It will also begin to mound a bit as you stir it.  Ms. Ray talks about what to do with left-overs of the rice pudding, but I think that is very funny.  Left-overs!  Snort.

If you want a more decadent version you can always make this with half-n-half.  I love it just the way it is.  I also love that I don't need to go shopping for anything to make it.  I just always make some extra rice when I'm cooking.  20 minutes to comfort food heaven!  This is why I love to cook.

Sunday, April 14, 2013

Hummus Anyone?


I think hummus is just about the perfect food.  I seriously could eat it every day and be very happy.  I work in a grocery store and it astounds me how much hummus we sell.  Not because I'm surprised people like it, but I'm shocked more people don't make it themselves.  It can be expensive to buy and, if using canned chick peas, can be made in about 15 minutes.  I can adjust it to suit my family and the flavors we like too.  We love lemon, so I make it with more lemon juice than some people might like.  If you like garlic or cumin, use more!  If you like roasted red peppers or avocado, throw them in.  Heck, dump in the Buffalo Wing sauce if you think it would be tasty. This is the perfect dish to play with.

If you have read my other posts, you know I'm a fan of using dried beans.  They are far more economical than the canned ones and they have far less salt.  However, I have made this recipe using canned beans many times.  I usually don't add extra salt when I use canned beans.  You will have to taste it and decide for yourself on the salt.  If you want to use canned beans then just scroll down to the directions for the hummus. One drained, rinsed can will make a batch.

Last night I put a bag of dried chick peas to soak.  I often will let them soak during the day and cook them at night.  I knew I would be around the house this morning, so I let them soak overnight.


Rinse the beans and pick out any stones.  Then just dump them into a large pot.


Cover the beans with water so that you have about two inches of water above the beans.  Cover the pot with a lid and let it sit on the counter overnight.  In the morning drain the beans.  They will be about twice the size.


Add fresh water to about 3 inches above the beans.  I threw in 3 smashed cloves of garlic, 1 quartered onion, 1 teaspoon dried thyme, 1 teaspoon salt, and 1/2 teaspoon black pepper.   Don't add anything acidic when cooking dried beans.  It will make them tough.  Bring the pot to a boil, cover and simmer for about 1 to 1 1/2 hours, or until the beans are tender.  This can be done in a pressure cooker in just a few minutes.

When the beans are done, drain them and reserve the cooking liquid.  I do this by putting a pan under the colander. 


The cooking liquid is full of flavor and vitamins.  It is fantastic to use as a base for soup.  Mine is becoming split pea soup as I type.


Rinse your chick peas under cool water and they are ready to measure and use to make hummus.

Hummus is a very basic, simple food to prepare.  It can be done without any fancy equipment, but a food processor or a blender makes it much easier.  Here are the ingredients I use as a basic recipe.

2 cups cooked chick peas
2/3 cup tahini 
3/4 cup lemon juice
2 garlic cloves, crushed
1/4 cup extra-virgin olive oil, or more depending on the beans
salt and pepper to taste


Let me say a word about tahini.  It is simply ground sesame seeds and there is no substitute when making hummus.  If you don't have it or can't find it, buy hummus in the grocery store.  I can get it in my grocery store, but when I lived in rural Indiana my sister had to send it to me in care packages.  It can be mail ordered, but it is cheaper to stock up when you travel to a larger city.

I use bottled lemon juice because I like a lot of lemon.  I don't want to spend that much time squeezing lemons.  Yes, fresh lemons taste better and you are free to use them.  This is all about what you like.

I simply dump everything except the olive oil in the the food processor.


I let it run until everything is well combined.


At this point the mixture is coarse and very thick.  Some people like a chunky hummus, but I prefer it to be more smooth.  At this point I turn the machine on and drizzle the oil in while the machine is running.  When it seems light and fluffy I stop the machine and taste the hummus.


I had a cup of tahini left in my jar and I wasn't going to waste it, so I just added more beans and lemon juice.  I did decide to add more lemon and more salt and pepper when I stopped to taste it.  

I got about 3 1/2 cups of hummus out of this batch.  I put enough cooked chick peas into the freezer to make 2 more batches.

That's all there is to making hummus.  It is fantastic served as pictured above.  I love to make pita sandwiches with lots of tomato and cucumber too.  Hummus and falafel sandwiches are incredible.  I have some falafel in the freezer.  Hmmmmm........

Wednesday, April 3, 2013

Artisan Individual Pizza


Do you love gourmet pizza?  How often do you wish you could get the same experience at home?  Well, I have very good news for you.  You can make dough in no time flat, seriously.  If you have never tried making no knead bread or dough, this should be reason enough to give it a try.  I threw some ingredients in bowl yesterday and pulled it out today to make pizza.  Five minutes a day.  That's it.  Really.

O.K.  When making the pizza it takes a couple of minutes to roll each one out.  I made four individual ones.  It would be much quicker if I were doing one.  We really enjoy customizing our own pizza, so why not do four smaller ones?  Mind you, the only one to eat their whole pizza was my fourteen year-old son.  The rest of us have lunch waiting for us tomorrow.

The recipe I used for the dough is the basic dough recipe from Artisan Bread in Five Minutes a Day by Jeff Hertzberg and Zoe Francois.  This recipe is posted all over the internet, so I don't think they'll mind me posting it again.  If you like this, I highly recommend getting the book out of the library and trying a few other recipes.  You will probably want to buy your own copy, like I did.

In a large container with a lid, combine the following:

3 cups lukewarm water
1 1/2 tablespoons yeast (1 1/2 packets)
1 1/2 tablespoons kosher salt
6 1/2 cups unsifted, flour.  Measure it using the scoop and sweep method.

Using a large wooden spoon (or your hand) mix the ingredients until combined.  Put the lid on, but not tightly.  The gas from the yeast needs to escape.  Let the container sit on the counter for two, or up to five, hours.  Then put it in the refrigerator and ignore it until tomorrow.  

When you are ready to make the pizza get all of your ingredients ready.  You can use whatever you like.  I usually buy a jar of pizza sauce or just use a little pasta sauce.  Sprinkle your cookie sheet well with cornmeal.  Turn your oven on to 500 degrees F.

Now flour a board or your counter really well.  Flour the rolling pin really well.  Open the container and sprinkle the top with flour really well.  Now reach in and grab a blob (I get a small grapefruit sized piece for the individual pizzas).  Cut the piece off with a sharp knife.  Put it on the board and flip it over so it is well floured.  Roll it out to the size you want.  If you are making one pizza, roll it directly on the cookie sheet.  Just make sure you use lots of corn meal for that.  I find it works better if I start rolling and set it aside while I start the second piece.  This gives the dough time to loosen and it rolls out better without pulling back.

I put two pizzas on one cookie sheet and let the kids make theirs while I roll the next two.


Into the oven the first two go for 10 minutes.  While those cook we make up the second batch.  Those cook for 10 minutes and we all enjoy our pizza.


See how big these pieces are?  Only three of the four would fit on the plate.  This was my son's plate.  None of the rest of us could manage this much.  He went back for piece number four.  It's a good thing he has Crew practice tonight.  He needs to burn off some calories.

We like to use turkey pepperoni so the pizza isn't greasy, but to each their own.  

For the ingredients listed I get four individual pizzas and I have enough left to make a loaf of Artisan bread tomorrow.  It can stay in the refrigerator for up to a week if I don't have time tomorrow.  

Treat yourself to some gourmet pizza.  You won't be sorry.


Wednesday, February 6, 2013

Homemade Egg Rolls


Egg rolls can be filled with whatever foods you like. I have even had avocado egg rolls. I have to say, they were delicious. Traditionally they are filled with a vegetable and meat mixture. In this country it is usually Chinese cabbage, carrots and bean sprouts. Chicken or pork are sometimes included. Napa or Chinese cabbage is usually more expensive than I buy. I just pick up a small head of regular green cabbage. Any leftovers can easily be made into cole slaw. I can’t say I have a set recipe, but here is what I do:

For 15 egg rolls:

½ small head of cabbage, cut into small strips or shredded
2 carrots, shredded (or a bag of shredded carrots)
1 package shitake (or whatever) mushrooms, finely diced
1 package bean or broccoli sprouts
1 bunch of green onions, thinly sliced (or thinly sliced onion)

Combine all of the above in a large bowl. Add marinade mix and let sit for one hour, stirring on occasion.

Marinade mix:

½ cup rice vinegar (or whatever kind you have)
½ cup sugar
1 to 2 tablespoons freshly grated ginger (this is worth spending a little money on for egg rolls. Ginger root is cheap and you don’t need very much)
1/2 teaspoon of crushed red pepper
4 cloves garlic, crushed

After marinating for one hour, pour into a colander and drain for 15 minutes.

I usually make egg rolls when I have left-over chicken or pork from another meal.  I just dice the meat and add it to the veggie mixture just before I fill the egg rolls.

When it is time to assemble the egg rolls, drain the veggies, chop the meat and add to the veggies. Get a small amount of water in a custard cup to use for sealing the egg rolls. I usually buy 2 packages of egg rolls wrappers, but get what you can afford. Any left over veggie mix can be thrown into fried rice.

Take an egg roll wrapper from the package and fill according to the directions on the package. You set it down with a point facing you, pat about 1/3 c. of veggies into the middle and bring the corner closest to you over the veggies. Dab water on all edges.  Fold the sides in to the center and finish rolling. Dab a little water on the corner farthest from you to seal the egg rolls. Set on a platter seam side down and finish rolling all the egg rolls.  It is vital you seal all the folded edges with water.  You want the veggies to steam inside the egg roll.  You don't want oil getting inside.


When you are ready to fry them get a large fry pan with a high edge. Add vegetable oil and/or shortening and melt until you have about 1 inch of oil. Put the heat to medium and test the temp by dropping a bit of cabbage into the oil. When it sizzles quickly the oil is ready. Carefully place several egg rolls in the pan, but do not over crowd them. Keep an eye on them and turn them when the bottom is brown. Cook the other side until brown and them remove to paper towels to drain. Keep the finished ones warm in the oven while you cook the rest.  Finish cooking all of the egg rolls.

If I have any of the mixture left I usually use it to make some fried rice to serve as a side dish.

Fried rice is very easy to make. I always cook my rice ahead of time, or just use left over rice. You could easily use instant or boil-in-the-bag rice too. Dice up whatever veggies you like or use left-over veggies from the egg rolls. Take some peas out of the freezer to add at the last minute. Stir fry your veggies in a very hot pan with a little oil. When the veggies are starting to look a little cooked, add your rice. Continue you to stir fry until the rice is crispy. At this point you can add some soy sauce, garlic and ginger, or you can use a packet of fried rice seasoning with soy sauce. If you have pre-cooked meat, add it now and keep stirring it until it is warm. Add the peas at the end and cook them just until they are heated through. Take your egg rolls out of the oven and enjoy a wonderful dinner! I also make my own duck sauce for dipping.

Duck Sauce

1 jar peach jam or orange marmalade (watch for these to go on sale and keep on hand)
¼ cup rice vinegar
1 to 2 tablespoons freshly grated ginger

Heat all of them together on medium to a boil. Turn down and simmer for 5 minutes. Let cool and use for dipping. Keeps in the refrigerator for a week or more.

The beauty of doing this yourself is two-fold.  First, you get to use ingredients you like in your egg rolls.  Second, you end up with way more than you ever get when you go out to eat at a Chinese restaurant.  They reheat nicely in the toaster oven.

Thursday, January 10, 2013

Lemon Angel Torte


Doesn't that look yummy?  It may not be picture perfect, but it will taste like summer on this January day.  This cake was made with store-bought ingredients and went together very quickly.

I love to make things from scratch for several reasons.  1) It is usually cheaper, 2) It is usually healthier, and 3) I like to cook.  However, I am always on the look out for a deal.  If I can pick up ingredients for a semi-homemade meal or dessert, I will do it in a flash.  I got the Angel-food cake on a buy one get one free deal.  This one has been in the freezer.  The lemon curd is from a Jello mix I got on a clearance shelf.


The pudding is cook and serve.  I'm not a fan of instant puddings, but if you like them feel free to use them.  I called my mother when I was cooking the pudding.  A nice chat later and into the refrigerator it went.  I do tend to think instant pudding tastes different than the cook and serve stuff.  Maybe it is because I grew up eating it.  I don't really know, but I don't mind taking the time to cook it.  I have made lemon curd from scratch many times.  It is wonderful, but I didn't have the ingredients on hand to do that today.  My whole outlook is 'make do with what you have'.

So, I cooked and cooled the pudding.  I took the cake out of the freezer and let it defrost a little bit.  It is easier to slice or cube cake when it is still a little bit frozen.  I cut it into 3 pieces and layered the pudding between the layers.


I like to let some of the pudding ooze down the sides.  It always makes my kids say, "OOOOOOOO!"

I don't put pudding on the top, but you can if you like.  I prefer to top it with whipped topping.


The assembly took less than 5 minutes.  My son ran to get his camera because he wanted a picture.  Nothing warms my heart like my son getting excited about the things I make in the kitchen.

If the cake had broken up while cutting it, I would have layered the cake cubes and pudding in a bowl and topped it with the whipped topping.  Then instead of a torte, you have a trifle!  This would be very tasty with fruit too.  I didn't have any today and no one is going to complain.  You can use any type of cake and any type of pudding.  Let your imagination run wild!  

Sunday, January 6, 2013

Fettuccine Alfredo Your Way

I love recipes that are tasty and can easily be modified to suit your tastes and your budget.  Homemade Fettuccine Alfredo is the perfect example.


We love to add things to our Fettuccine Alfredo.  Often we add broccoli, sometimes grilled chicken, maybe mushrooms.  It depends on what we have, what we can afford and our mood.  A lot of the time we have it plain.  Our kids love this dish too.  They tend to pick out the mushrooms, but I'm happy to take their discards.  This is not a soupy Alfredo like you often get in restaurants.  This is the real deal.  The kind they used to make right at your table in nice restaurants.  It is just as quick as heating up the soupy stuff from a jar and tastes a million times better.  My husband found this recipe in the New York Times Cookbook.  He has been making it for 20 years.  I am usually in charge of any add-ons.  For the dish above I browned pancetta and mushrooms, and lightly steamed broccoli.

Here are the ingredients for the basic recipe.  We doubled it so we would have lots of left-overs for lunches this week.

1 pound fresh pasta (we always use the dry in a box)
1/4 pound butter (1 stick) cut into 8 pieces
freshly ground pepper to taste
1 cup half-and-half (we often just use milk, but it is better with half-and-half)
1/4 pound grated Parmesan cheese (about 1 cup)
2 large white truffles, sliced (optional)   Very optional.  We have never used them.

I will say the Parmesan cheese makes a big difference.  Buy the most expensive one you can afford.  We have made this with the stuff from a jar right through to Parmigiano-Reggiano.  It will taste best with better quality cheese, but it is good with any.


We bought 1/4 pound of thinly sliced pancetta, which I cut up and browned.  Pancetta is an uncured Italian bacon.  It has a cleaner taste than American bacon, but we have used regular bacon many times.  Then I sliced some white mushrooms and browned them.


I steamed the broccoli while the pasta was boiling and set the add-ons aside.  


Once the pasta was drained my husband went to work.  This method is a bit different, but the result is sublime.  For this recipe you drain the pasta and turn the burner down to low.  Put the drained pasta back into the pan and stir it to dry out.  Then you begin adding the butter.  Add about 1/3 of it and stir until it is melted and coating the pasta.  Repeat two more times.


When the butter is all incorporated, begin adding the cream or milk.  Pour in about 1/3 of it and stir until it is absorbed.  Repeat two more times.  This happens more quickly with cream than with milk.


You can see when it is absorbed.


Next you begin  adding the cheese.  It gets more difficult to stir now because the cheese melts and is sticky.  Add about 1/3 and stir until it is melted and you don't see pieces any more.  Then add some more.  If you add it all at once it will create a big blob that is hard to break up.


It creates a lovely, thick sauce this way and it only takes a few minutes.  Use a rubber spatula to scrape all the yumminess into a serving bowl and add your extras.


Serve with black pepper and extra cheese, if you like.  We usually don't bother with extra cheese, but some people may want more.

I highly recommend putting the pot to soak while you eat.  It will be much easier to clean if you do.

This is such an awesome dish and so impressive to serve to guests.  You can add just about anything you like to it.  Lots of people love grilled shrimp or peas.  I'm not a fan of either, but that is the true beauty of this dish.  You make it your way.  Enjoy!


Thursday, December 20, 2012

Cookies & Cream Fudge

 I love to make goodies for my family and friends during the holidays.  One thing I love to make is fudge.

 (I had to borrow this picture, because my kids ate the fudge before I had a chance to get a picture of the pieces.  The rest of the pictures are mine.)

I'm talking real, old-fashioned fudge.  Not that the quick stuff with sweetened condensed milk and chocolate chips isn't yummy, but it is rather expensive to make.  I can make old-fashioned fudge using ingredients I have on hand this time of year anyway.  I use the recipes from my Fannie Farmer Cookbook.  The instructions in that cookbook are excellent.  Just do what Fannie says.  It takes some time, but it isn't difficult at all.  Don't try it when you are running tight for time.  Pick an evening when you are going to be hanging around the house.  The mixture takes 30 to 45 minutes to cool enough to mix.


This is the grand total of the ingredients needed.  Sugar, cream, vanilla, salt and chopped sandwich cookies.  I buy the store brand and I used 1/3 of the package.  My kids were happy to eat the rest of them.

Equipment is a factor here.  You can't make candy without a candy thermometer.  Well, you can, but you have to know how to test it in water and that can be messy and tricky.  I also wouldn't recommend making fudge without a stand mixer, unless you happen to work out a lot.  You would need to stir the thick mixture for quite a while.  It takes 7 to 10 minutes with the stand mixer.  Ladies managed to do it in the days before modern kitchen equipment, but I bet they had help with the stirring.  That being said, if you have the equipment go ahead and give it a try.  Your family will love you.

Here is the recipe I used:

Opera Fudge

2 cups sugar
1 cup heavy cream
1/8 teaspoon salt
1 teaspoon vanilla

The cookies were my idea.  They aren't listed in Fannie Farmer's Cookbook.

Line an 8 X 8 inch pan with foil and butter thoroughly.


Combine the sugar, cream, and salt in a 3-quart heavy pot, stirring to blend well.  Place over medium heat and, stirring, bring to a boil.  Cover and let boil for 2 to 3 minutes.  Uncover and wash down the sides of the pot with a pastry brush dipped in cold water.  Attach the candy thermometer to the side of the pan and continue to boil over medium heat, without stirring, until the syrup reaches the soft-ball stage (234 degrees F).

Remove the pot to a cooling rack or surface and allow to sit, without stirring, until the temperature reaches lukewarm (110 degrees F).


Using a rubber spatula, scrape the mixture in the bowl of a stand mixer.  Add the vanilla and, using the paddle attachment, beat until creamy.  The fudge will thicken and lose it's glossy look.


Add the chopped cookie bits and mix just to combine.


Spread the mixture into the prepared pan.  Cover with a damp paper towel for 30 minutes and then allow to sit and dry a bit.  Score the top and cover tightly.  This fudge tastes better after sitting overnight.  Store in an air tight container.  


Oh my goodness, was this ever yummy!!  I made more to give my nephew.  He loves those Cookies & Cream candy bars.  I think he will love the fudge.  

I also made the Chocolate Fudge from the Fannie Farmer Cookbook.  It follows the same method, but uses a few more ingredients.

1/4 cup cocoa powder or 2 ounces unsweetened cocoa
2 cups sugar
3/4 cup milk
2 tablespoons light corn syrup
2 tablespoons butter, in small pieces
2 teaspoons vanilla

You use the exact same method.  Start by cooking the cocoa, sugar, milk, corn syrup and sugar. This recipe calls for bringing it to a boil over low temperature.  After it reaches 234 degrees, remove it from the heat and drop the butter in.  Do not stir.  Let it cool to 110 degrees.  Put in the mixer and add the vanilla.  Beat until it thickens an loses the glossy look.  

As you can see, fudge isn't difficult.  It just needs time.  When it comes to washing the dishes, let them soak in hot water for a while.  The water will dissolve the sugar and it will be a snap to wash them.

If you order fudge online it costs $11.99 per pound, plus shipping.  Other than the cookies, I just used stuff I already had on hand.  I could have made 3 batches from the bag of cookies.  It tastes just as good and costs far less to make.  Plus you get major points for making something by hand.