Wednesday, October 10, 2012

Egg Bread and Sticky Buns (Challah and Schnecken)


Do you have a meal you remember fondly from your childhood? Something your Mom, Grandmother, or Aunt made? I sure do. My favorite meal growing up was my mother's chicken soup with matzah balls (we called them alkies) and her egg bread. There was no greater treat than walking into a house full of those smells. I grew up fascinated watching her make the dough and form the bread. I wish I could tell you her Challah bread recipe had been handed down from her mother, who learned it from her mother, etc. She did learn to make the soup that way, but not the bread. She took a cookbook out of the library when she was a young bride and found this recipe. She was never able to remember the name of the cookbook and never saw it again. She loved all of the recipes she tried. Thank goodness she wrote this one down. I wish I could credit the author, but this was about 50 years ago. I honestly don't know how much is the original recipe and method and how much my mother may have tweaked it over the years. All I know is that it is delicious!


This recipe is laid out in steps. 
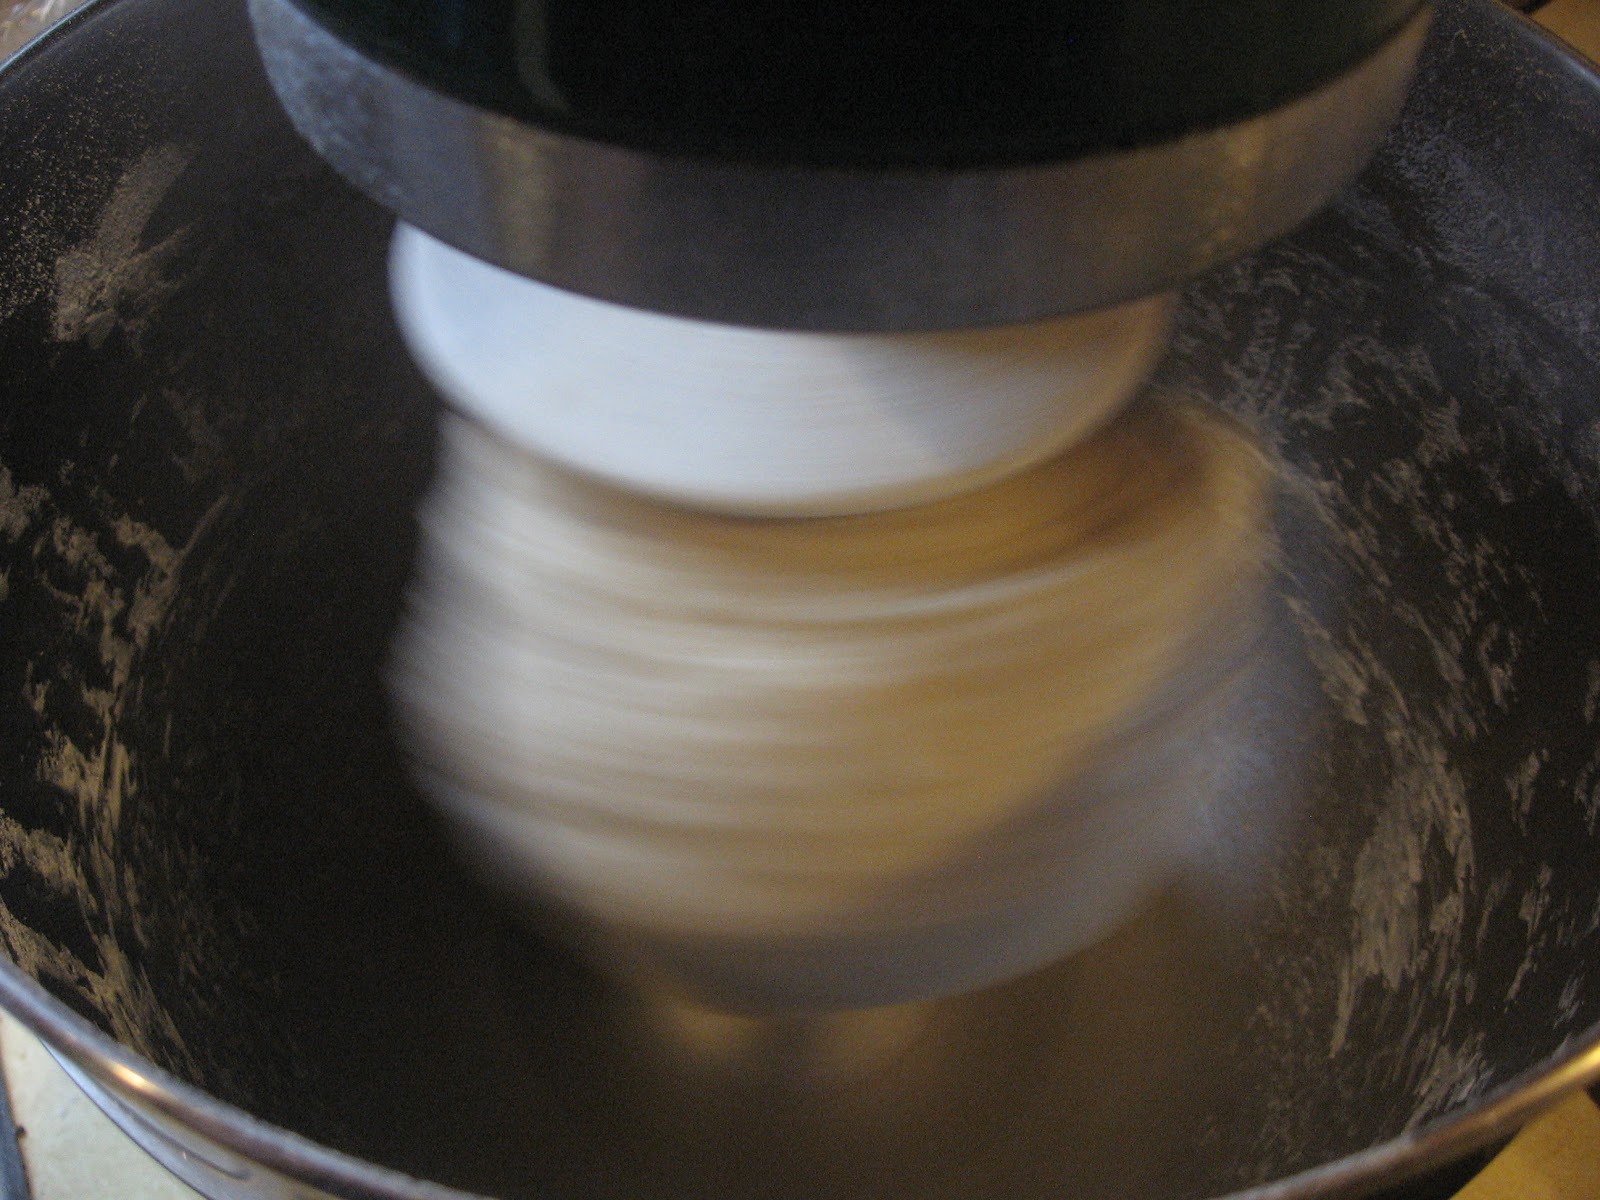
First you proof the yeast, then you mix in some dry ingredients, then the eggs, butter and the rest of the flour go into the bowl. The original recipe makes 4 loaves of bread. I often cut it in half because my KitchenAid mixer isn't large enough to do the full recipe. I will mix up the full recipe,in a huge bowl I have, if I want to put some loaves in the freezer.

Since I use instant yeast and my dough hook, I just put in the dry ingredients from steps one and two, and then add the water from both steps. Then I add the rest of the ingredients from step 3. 
 
For today I cut this recipe in half. 

Step 1 - Combine and let stand:

1 cup warm water
2 teaspoons sugar
½ teaspoon ground ginger
4 pkgs (2 ¼ tsp each) dry yeast

Step 2 - In another bowl mix:

4 cups flour
1 cup dry milk (optional)
2 cups warm water
1/3 cup sugar

Step 3 - Add yeast mix to flour mix and beat. Add the following:

½ cup soft butter
2 teaspoons salt
4 eggs
4 cups flour


Knead the mixture with 1 cup or more flour until smooth and elastic, about 6 minutes. Place in greased bowl and cover. Allow to rise until doubled. 1 hour on the counter, or using the microwave rise method. I've seen this dough rise in 20 minutes if the conditions are right.


Punch the dough down and form into 2 large or 4 small braided loaves.  Since I cut this recipe in half,  for one loaf of Challah and one batch of sticky buns, I cut the dough in half and cut one half into 3 pieces to use for braids.

 
I find my braids look nicer if I start braiding in the middle instead of at one end.


Move the loaf to a cookie sheet, cover and allow to rise a second time.
 
 
 Brush with egg yolk mixed with a little water. You can sprinkle the loaves with poppy seeds or sesame seeds. Bake at 375 degrees F for 30 minutes or until golden brown. This Challah recipe continues to rise in the oven. Not all breads will do this.


If you are keeping Kosher and want to serve this with meat, leave out the dry milk and use margarine.

It is traditional to braid this dough, but you can form it into regular loaves, rolls or whatever shape you want. It holds a shape very well. I love to use this dough to make sticky buns. I used half of it today to do that very thing.

To make sticky buns you roll one quarter (half of what I made) of the above recipe into a large rectangle. I use my cutting board as a guide, but you want it to be about 12 inches by 18 inches. Remember, when rolling out bread dough it helps to let the dough rest for a minute or two here and there. The gluten will relax and it won't spring back on you if you let it rest.  


Spread softened butter all over the dough and sprinkle with some white sugar, brown sugar and cinnamon. I don't have specific measurements, but you don't want too much of anything. Otherwise they will just be sloppy. I probably use about 1/3 cup of each sugar and about 4 to 5 tablespoons of butter. I use about 2 teaspoons of cinnamon. If you like chocolate chips or raisins, sprinkle some of them on now.


 Then roll the dough up starting with a long end. Cut the dough in half, then cut each half in half. Cut each quarter into 3 pieces. You can put them straight into a pan if you just want cinnamon buns. If you want sticky buns, mix the following and pour it into the bottom of the pan before placing the buns on top.

Mix together in a bowl:

2 tablespoons corn syrup
¾ cup brown sugar, packed
6 tablespoons melted butter
chopped pecans, if you have them and like them.


Allow the sticky buns to rise until doubled and bake in a 350 to 375 degree oven for about 30 minutes, or until golden brown.


I wish you could smell my house right now.


Monday, October 8, 2012

Chicken Tetrazzini, my way.

My sister has a friend who gave her two beautiful heads of golden cauliflower the other day.  My sister gave one to me.  It was a gorgeous color and I wanted to use it when it was fresh.  I had already defrosted two boneless, skinless chicken breasts, so it was time to hunt for a recipe.

There are a number of sites that allow you to put in ingredients and will search recipes using them.  Dole foods has one with a focus on healthy eating. 

http://www.dole.com/EatrightPantry/tabid/909/Default.aspx

Another favorite of mine is foodtv.com.  This is the website for the Food Network.  You can type your ingredients in the search bar and it will find recipes using them.  This is where I found the Chicken Tetrazzini recipe I used as an outline for my dinner.


Isn't the golden cauliflower pretty?
 
 Rachael Ray created this recipe and it sounded really yummy. Here are the ingredients she listed.  

  • Kosher salt
  • 1 small head cauliflower
  • 8 ounces extra-wide egg noodles
  • 1 stick (8 tablespoons) butter
  • 8 ounces assorted fresh mushrooms or white mushrooms, sliced
  • 4 cloves garlic, finely chopped
  • 1 large or 2 medium shallots, finely chopped
  • 3 tablespoons all-purpose flour
  • 1/2 cup dry sherry
  • 2 cups chicken stock
  • 1 cup heavy cream
  • Freshly ground pepper
  • Freshly grated nutmeg
  • 3 to 4 cups shredded Poached Chicken Breasts, recipe follows
  • 1 cup panko
  • 1 cup grated Parmigiano-Reggiano
  • 1/4 cup chopped fresh flat-leaf parsley
  •  
    This recipe calls for making a wine cream sauce and baking everything together in a casserole sprinkled with buttered breadcrumbs and Parmigiano-Reggiano.  The only problem was, I didn't have all of these ingredients.  That's o.k. though.  There are many things that can be substituted and still provide you with a very tasty dish. 
     
    My family doesn't like buttered breadcrumbs on their casseroles.  O.K.  Scratch that right off the list.  I can't afford Parmigiano-Reggiano, but I have regular grated parm.  I don't have fresh parsley, so I just leave it out.  Parlsey looks very nice, but it isn't a strong flavor and likely won't be missed. 
     
    The major things I didn't have were sherry, heavy cream and shallots. 
     
    I never have sherry in the house, but I have a bottle of Marsala wine.  We like to make chicken Marsala and usually have some on hand.  For a wine cream sauce, you can safely substitute any white wine you like the taste of.  If you don't drink, use more chicken stock.  Leaving the wine out will change the flavor of the sauce quite a bit.
     
    Shallots are similar to onions, with a slightly garlicy flavor.  I used one onion and added an additional clove of garlic.
     
    Heavy cream sure is tasty, but it is very high in calories and fat.  Not to mention I never seem to use it all up before it goes bad.  A terrific alternative to cream is evaporated milk.  It is much lower in calories and fat (you can get evaporated skimmed milk too) and it is shelf stable.  Aldi's had it for $.65 a can today.  It is nice and thick and doesn't usually curdle.  I use it in place of cream for most cooking.  It makes lovely cream soups too. 
     
    I started out by cooking the cauliflower and poaching the chicken breasts.  I added celery leaves, a couple baby carrots, some onion, salt, pepper and dried thyme into the water when I poached the chicken.  The trick to tender chicken breasts is to not let the water boil.  Bring it up to a simmer and let the chicken poach gently.  If it boils hard the chicken will get tough.


    You can cook the cauliflower and poach the chicken in advance.  You can also use frozen cauliflower and any left-over chicken you have on hand.  I also cooked my pasta while these items cooked.  While everything was simmering, I chopped my mushrooms, onions and garlic.


    I melted 4 tablespoons of butter and started cooking the mushrooms.  When they softenend I added the onions and garlic.


    While these cooked, I drained the cauliflower, the pasta, and cut up the chicken.  Then I washed all those pans, so I didn't have a sink full after dinner.  When the onions were getting see-through, I sprinkled the flour over it all.  The flour and butter cooked together creates a roux.  This will thicken your liquid.


    I cooked them and stirred them together for a minute. 


    Then I added the chicken stock and brought it to a boil, while stirring.  When it started to thicken, I added the 1 cup of evaporated milk.  I let that come back up to a good boil.  I seasoned it with salt and pepper, and a little nutmeg. 


    Then I mixed the cauliflower, chicken, pasta and sauce all togther, poured it into a casserole dish and sprinkled it with greated parm. 
     

    Into a 400 degree oven it went  for about 30 minutes, and we had a lovely dinner!

    Don't be afraid to adjust recipes to suit your panty and your taste buds.  As you experiment, you will find things that work well and that you like.  Think of recipes as an outline, not something carved in cement.


    Saturday, October 6, 2012

    Homemade Bread In An Hour. Really.

    You honestly can make homemade bread, and have it hot out of the oven, in just about an hour.  In order to do this you do need a couple of things.  Either a mixer with a dough hook or a food processor with a dough blade, and a microwave oven.  If you don't have a mixer or a food processor, add 15 minutes.  If you don't have a microwave, add 1 1/2 to 2 hours.  The microwave rising method is the big time saver here. 

    Here is what the dough hook for the mixer and dough blade for the food processor look like.


    I was lucky enough to get a Kitchen Aid Mixer as a wedding gift, 19 years ago.  I inherited a Cuisinart Food Processor from my husband's step-mother.  I see mixers with dough hooks and food processors with dough blades at Goodwill all the time.  If you don't have one, you can knead the dough by hand.  That takes about 10 to 15 minutes, depending on the dough recipe.
     
    The other helpful thing to have is either a glass or a silicone bread pan.  These can be put into the microwave for the second rise.  I picked up a silicone one at Goodwill for $.99.


    A basic white bread recipe will take about 1 hour, from start to finish.  Some whole grain recipes will take longer to rise and bake, just because the dough is heavier.  Those doughs can take an additional half hour, or so. 
     
    The bread I made here is a basic white bread recipe from the Fanny Farmer Cookbook.
     
    2 Tablespoons shortening
    1 1/2 teaspoons salt
    2 Tablespoons sugar
    1 cup hot milk
    1 package (2 1/4 teaspoons) yeast
    6 cups of white flour, you may not need that much.


    My method obviously varies from the published recipe.  I also cut back on the salt.  The original recipe calls for 2 1/2 teaspoons.  I don't like my bread to taste salty, so I cut out a teaspoon.  I also use instant or quick yeast.  I buy it in bulk and keep it in the freezer.  Instant yeast doesn't need to be proofed in warm water.  You just add it in with the flour and add 1/4 cup of warm water into the recipe when adding the milk. 

    This recipe produces a classic white bread, the sandwich type.  Adding shortening to a recipe will soften the bread.  If you want a crusty white bread, don't choose a recipe with shortening.

    Fill a teakettle and put it on to boil.  You will need 1 cup of boiling water to put in the microwave when the dough is rising.

    Start by putting the shortening into a glass measuring cup and melting it in the microwave.  I melt the shortening before adding the milk because I found this to be quicker.  If you add the milk with the shortening, it takes longer for the shortening to melt.  I heat the shortening on high for 1 1/2 minutes.  I have an old microwave, so it may take less time in yours.  Then I pour the milk into the same cup.  It looks funny, but that is just the shortening.


    Put the milk and shortening back into the microwave for 1 minute.  While this heats, measure 3 cups of flour, the sugar, salt and yeast into the mixer or food processor.  I'm going to give directions using the mixer, but I'll add food processor directions for mixing and kneading at the end.

    Add the 1/4 cup warm water and the milk/shortening mixture into the mixer bowl, fitted with the dough hook.  Put the mixer on to medium and let it begin mixing.


    Let the mixer run until the flour is incorporated.  It will still be very sticky.
     
     
    Continue adding additional flour, 2 tablespoons at a time, until the dough isn't sticky.  Let the flour mix in all the way before adding more.   In this next picture you can see the dough is still sticking to the bottom of the bowl.


    When you have added enough flour, the dough won't stick to the bottom of the bowl and it will begin to clean the sides of the bowl.


    Let the dough continue to knead for a few more minutes.  The total process of mixing and kneading takes about 10 minutes.  When the dough is ready it won't stick to your fingers when you touch it and it should feel smooth and elastic. 


    Put the dough into a microwave safe bowl that has been sprayed with cooking spray.  Flip it over once, so both side are coated with oil


    Cover the bowl with plastic wrap and put it into the microwave with 1 cup of boiling water.  Make sure the water is in a microwave safe cup as well.


    Next comes the microwave rising method.  It is essential you follow these directions exactly, and that you set the power to 10% or warm.  Anything higher than 10%/warm and you will cook the dough.
     
    Set your microwave to cook for 3 minutes on 10% or warm.  My microwave is older and only has a warm button.  I can't adjust the percentage.  Please check your manual if you don't know how to adjust the settings on your microwave
     
    After the 3 minutes are up, leave the door closed and allow the dough to rest for 3 minutes.  I set the kitchen timer on the microwave.  After the 3 minutes of rest are up, set it to heat for 3 minutes on 10% or warm again. 
     
    Leave the door closed and let the dough rest for 6 minutes.  That is it.  Check the dough by poking it with your finger.  If the indentation stays and it looks bigger, it is done.  Once in a while I will get a dough that doesn't seem to have risen enough.  Usually it is a whole grain dough that does this.  I will just set it for 3 minutes on 10% or warm again, and let it sit another 6 minutes.  This has always worked for me. 
     
    Set your oven to preheat to 375 degrees.
     
    At this point you form your dough into whatever shape you want.  I have found my loaves rise more if I pat the dough into a rectangle and roll it up from short end to short end before putting it into a bread pan.  I don't know why this works, but it does.  You can also just form it into a log and drop it into a bread pan.  Then simply repeat the microwave rise method.  Remember to cover the dough with plastic again.  After the second rise, the dough should look like this.
     
     
     You can see the dough is above the top of the bread pan.  I like to put the silicone bread pan on a cookie sheet.  It is just easier to get it out of a hot oven like that.  Put the bread into the oven and let it bake for 20 to 30 minutes, until golden brown.  If you have a convection oven, it will cook a bit faster.


    If you want a nice, soft crust rub the top of the bread with butter while it is hot. 
     
     
    Fresh, homemade, hot bread in just about 1 hour.  How can you beat that?  Sorry that last picture is a little fuzzy.  I was excited and hungry!
     
    If you don't have a mixer or a food processor, you can mix and knead the bread by hand.  It will take about 15 minutes to knead it on a floured counter.  Add flour a little at a time, until it is smooth and elastic and not sticky. 
     
    Here are the directions for mixing and kneading in a food processor:
     
    You want to use cold liquid ingredients instead of warm.  This is because of the heat from the processing blade.  Put the dough blade into the machine.  Add the dry ingredients (3 cups of flour) and pulse to mix. Add the shortening and pulse to cut it into the flour.  Add the wet ingredients and mix until the dough comes together.  Allow the dough to rest for 15 minutes.  After 15 minutes, add 2 Tablespoons of flour and pulse to incorporate.  Add more flour and pulse until the dough pulls away from the sides of the bowl and is smooth.
     
    This method takes a few more minutes than the mixer and the dough hook, but it is still quick and easy.
     
    The first few times you make bread this way, it will probably take you a little longer than an hour.  As you get familiar with the process, you will speed up.  If you love hot, fresh bread this is the way to go.  Of course, if you want to make rolls you can form them after the first rise and let them rise on a cookie sheet or a larger pan for 45 minutes to an hour, the traditional way.  My microwave isn't large enough for a large pan or cookie sheet to fit in it.   Either way, you can have homemade bread just about any time you want it by using the microwave for rising the dough.


    Thursday, October 4, 2012

    Make It Yourself

    Money is tight for many people these days.  Even if you have a job and feel reasonably secure, it doesn't hurt to cut corners where you can.  There are so many things you can make for yourself, and sometimes it is much healthier to do so.

    One thing that always struck me as odd is when people throw away bread crusts and then turn around and buy bread crumbs.  A basic container of bread crumbs costs $1.79 at my store.  Granted, that isn't a lot of money, but why spend it when you are already throwing away the ingredients to make it?

    I keep a bowl on top of my toaster oven.  Everyone takes out the crusts and drops them in this bowl.  The heat from the toaster oven dries them out nicely.  Any slightly stale bread goes in there too. 


    I break the crusts into smaller pieces and drop them into my food processor, using the basic metal blade. 


    I pulse the blade a few times and then just let it run for a minute or so, until the crumbs are fairly fine.


    If there are any large lumps, I will pulse it a few more times to break them up.  Sometimes I get a stubborn lump and I will just remove that and throw it away.


    When I am happy with the consistency, I put them into a plastic container and put the bowl back on top of the toaster oven.


    I keep a second container of Italian Seasoned Bread Crumbs.  To make those I add a teaspoon each of salt, pepper, Italian Seasoning, and granulated garlic.  Then I rinse out the food processor and I'm all set.  The whole process takes about 5 minutes. 

    Another thing I like to make for myself is Taco Seasoning.  I have all of the ingredients in my cupboard already, so I can't see buying it too.  Here is what I mix together:

    1 Tablespoon Flour
    1 teaspoon Chili powder
    1 teaspoon Paprika
    3/4 teaspoon Salt
    1 teaspoon Minced onion
    1 teaspoon Cumin
    1/4 teaspoon Cayenne pepper
    1/2 teaspoon Garlic powder
    1/2 teaspoon Ground oregano

    Just brown the ground beef and add the seasoning.  Stir in 3/4 cup of water and allow to simmer until it thickens.  You can make up larger amounts and keep this in a container as well.  This mixture has far less salt than the packets you buy. 

    If you spend some time poking around on the internet, you can find recipes for most of the packets and mixes you buy.  You probably have everything on hand already and you will save a bunch of money. 


    Wednesday, October 3, 2012

    Cooking With Beans

    I love beans. They are probably one of the healthiest foods that are abundantly available to us. They are also very inexpensive and easy to prepare. They come in all sizes and colors. Each type of bean has a slightly different flavor and texture. I like different ones for different dishes, but I will happily toss just about any of them into soups and salads to add extra protein and fiber to a meal. They are also very filling.  Did you know when you combine beans with rice they create a perfect protein?
     
    Here are some of the beans I try to keep on hand.  I often have many others as well.
     
     
    I think the most common way people eat beans are in baked beans.  Baked beans are wonderful and if you like them you will probably like many other bean dishes. Did you know that the slow cooker was designed originally in order to cook baked beans? Baked beans and brown bread are a New England classic and grace our table often.  I talked about making Brown Bread in the Crock Pot the other day.  Now it's time to talk about the beans.

    Canned beans are very nice to have on hand for quick meals, but they are more expensive and have a higher salt content than dried beans cooked at home. Much of the sodium will be washed away if you simply drain and rinse the canned beans before using them. I will be honest, I would be less inclined to use dried beans so often if I didn’t have my pressure cooker. I can cook dried beans up in a snap. Otherwise it does take some planning ahead to have them simmering on the stove for a couple of hours on a day off. That works just fine too and the beans freeze beautifully.   Maybe reading about how easy it is to use will convince you to give a pressure cooker a try. New, modern pressure cookers are very safe and can’t explode like your grandmother’s might have.  Keep in mind that a can of beans can cost between $.79 to $2.00 a can.  A one pound bag of beans is usually between $1.00 and $2.00.  The bag of beans will make the equivalent of 4 to 5 cans of beans. 

    Most of the time recipes for dried beans tell you to soak them overnight, which is fine if you are going to be home the next day. I usually put my beans to soak in the morning and cook them in the evening. If I am doing a slow cooker recipe I will cook the beans in advance and have them ready and in the refrigerator. If I am making Boston Baked Beans I don’t fully cook the beans prior to putting them into the slow cooker. Once the beans have soaked here are the cooking times for my pressure cooker (at full pressure):

    Adzuki beans 6 to 8 minutes
    Black beans 8 to 10 minutes
    Black-eyed peas – no need to presoak, just cook
    Calypso beans 4 to 6 minutes
    Cranberry beans 9 to 12 minutes
    Fava beans 12 to 18 minutes
    Garbanzo beans (Chick peas) 10 to 12 minutes
    Great Northern beans 8 to 11 minutes
    Kidney beans 9 to 12 minutes
    Lentils…no need to presoak, just cook
    Lima beans 4 to 7 minutes
    Navy beans 5 to 8 minutes
    Split Peas 10 to 12 minutes
    Pinto beans 5 to 7 minutes
    Red beans 4 to 6 minutes
    Soybeans 10 to 12 minutes

    To prepare dried beans rinse them and look for stones or bad looking beans. Put them into a large clean pot and cover with water to a depth of at least 2 inches of water above the beans. Cover and let sit overnight or all day while you are at work. When you are ready to cook the beans, drain the water. Put the beans into the pressure cooker and add 3 cups of water for every 8 oz. of beans. DO NOT ADD SALT AT THIS TIME! Adding salt, or an acid like lemon juice, before the beans cook will toughen the shell and they will not cook fully. Add an onion cut into chunks, a crushed glove of garlic, some black pepper, and 1 teaspoon crushed thyme. Seal the cooker and bring up to full pressure. Begin timing the beans when you reach full pressure.

    If you do not have a pressure cooker add 2 or 3 cups of additional water with the other ingredients, cover and simmer for 2 hours. Check the beans to see if they are soft. Cook additional time, if needed. I like to prepare beans this way in the winter when I am home. When the beans are cooked, drain them and use them in your recipe (unless you are making bean soup, then just proceed to make the soup according to the recipe) or cool and freeze them in containers of 1 or 2 cups for recipes. The cooking liquid left after making beans is full of vitamins and flavor. I often freeze it to add to soups and stews later.

    Here is a wonderful Boston Baked Bean recipe from The Best Slow Cooker Cookbook Ever by Natalie Haughton:

    For 8 to 10 servings

    1 (16 oz ) package of Great Northern or Navy beans, cooked partially as mentioned above.
    2 cups very hot water
    1/3 cup dark rum (I never have this)
    ½ cup molasses
    ½ cup packed brown sugar
    2 teaspoons dry mustard
    1 medium onion, chopped
    ¼ teaspoon black pepper
    ¼ pound salt pork, rind removed, pork chopped (I always use bacon)
    Salt to taste

    Add beans to slow cooker. Add remaining ingredients, except salt. Mix, cover and cook for 5 to 6 hours, or until the beans are tender. Salt to taste and serve. 
    I shared by Brown Bread recipe already, but here is another way to enjoy the same flavor without taking as much time.  You will not get the same dense consistency with the muffins as you get with the steamed bread.

    Brown Bread Muffin recipe from William-Sonoma Muffins& Quick Breads:

    ½ cup rye flour (I often just use regular flour)
    ½ cup yellow cornmeal
    ½ cup whole wheat flour
    1 ½ teaspoons baking soda
    ¾ teaspoon salt
    1 cup buttermilk (or yogurt and milk combination)
    ½ cup firmly packed dark brown sugar
    1/3 cup vegetable oil
    1/3 cup molasses
    1 egg
    1 cup raisins

    Preheat oven to 400 degrees. Butter standard muffin cups.

    In a medium bowl stir and toss together the rye flour, cornmeal, whole wheat flour baking soda and salt. Set aside. In a small bowl whisk together the buttermilk, sugar, oil molasses and egg until smooth. Add the dry ingredients and stir until just blended. Do not over stir.  Stir in raisins.

    Spoon into muffin cups, filling them about 2/3 of the way full. Bake until a toothpick inserted in the center of a muffin comes out clean, about 15 minutes. Cool in the tins for a minute, then remove.

    The bread and the muffins can be made in advance and served in a day or two, or frozen for up to a month. Often dishes made with beans actually improve in flavor if they are refrigerated overnight and then reheated. This is the kind of a meal that can be sitting in the crock pot and everyone can help themselves to whenever they are home and have time to eat. Just remind them to put the top back on the crock pot so the food is warm for the next hungry family member who comes home.

    Another absolute favorite of mine is Black Beans and Rice. There are tons of recipes out there. This is one I have modified to suit our tastes. It is prepared in a pressure cooker, but can be done in a slow cooker or on a stove. You will need more liquid if cooking it on a stove, and obviously you will need more time. However, this dish freezes and reheats beautifully.

    2 tablespoons vegetable oil
    1 package andouille sausage, casings removed and browned
    1 large onion, chopped
    1 medium red bell pepper, seeded and chopped (frozen ones are fine)
    2 chopped tomatoes (if using canned, add them after the beans are cooked)
    2 crushed garlic cloves (1 teaspoon granulated will work)
    ½ teaspoon dried oregano
    3 cups chicken stock, broth, or soup base
    1 pound dried black beans, soaked and drained
    Salt to taste to be added after beans are cooked.

    In the bottom of the pressure cooker heat the vegetable oil. Add the onions, garlic and peppers and cook until soft. Add the browned sausage and the oregano. Stir until you can smell the oregano (about 1 minute). Add the stock and beans and tomatoes, if fresh.

    Lock lid in place. As pan comes to full pressure put on a pan of rice to cook. When the pressure cooker is up to high pressure, cook for 7 minutes. Remove from heat and quick release the pressure. Return the pan to the heat and check to see if the beans are tender. You can repressurize if you need to or let them simmer until they are done. Add the canned tomatoes, if using, and salt to taste. Mash some of the beans to thicken the sauce.

    Serve in a bowl with a generous helping of rice. 

    This is the kind of dish I will make when I have put the beans to soak in the morning. You could soak the beans over night and let them boil while you get ready for work. Put this into the crock pot just before you leave.  You can dice your onions and peppers, and brown your sausage the night before. Keep the sausage in the refrigerator over night. Put it together, keeping in mind the salt issue, and let it cook all day. Try to avoid using bouillon when cooking beans because it has so much salt in it. You can make this same dish using dried kidney beans. Then you have red beans and rice. Use whatever kind of sausage your family likes. Hot Italian sausage is wonderful in this dish. You can also throw this dish together very quickly with canned beans.

    Hummus is another favorite dish of mine. It is a cold bean paste made with chick peas, sesame paste (Tahini), garlic, lemon juice and olive oil. I could live off Hummus and pita bread.

    Chili is an American favorite that is made with beans. Everyone has their favorite recipe and it can be made just as easily with inexpensive dried beans.

    If you haven't ever cooked with beans much, give them a try.  The extra fiber and vitamins are a plus to just about any diet. 


    Tuesday, October 2, 2012

    If you only ever try one thing I make, try this.

    I'm serious.  This has to be the dish.  You must make it.


    I said the other day, sometimes things you don't like will taste good in a dish.  This is a perfect example.  I hate beer, but I tried an Irish stout beef stew at a local Irish festival and it was really good.  The whole family liked it, a lot.

     We have friends that visited last summer.  My husband bought a six-pack of beer for them.  They drank two.  They came back this summer, and they drank two.  We had two left.  Yep, over a year old.  Since I had lots of left-over pot roast, I decided to make a beer & beef pot pie.  I could have made this into a stew and served it over noodles, mashed potatoes, or rice.  I could have topped it with Bisquick biscuits or with pie crust.  I had some puff pastry in the freezer from when I made a batch a couple of months ago.  Yes, I did make puff pastry.  I wanted to see if I could and, thanks again to Jacques Pepin, I could and I did.  If you want to try it, watch this video.  He makes it really easy.  http://blogs.kqed.org/essentialpepin/2011/09/10/episode-115-all-puffed-up/#

    This is what it looked like after defrosting in the refrigerator overnight.
     
    I rolled it out until it was a little bigger than my pan and I covered it with plastic until I was ready to put the pot pie in the oven.


    Now onto my pot pie...
     
    I used the left-over pot roast, cut into cubes.  If I didn't have that, I would have used stew beef.  If you have raw 1 to 1 1/2 lbs. of beef you put 1 cup of flour into a Ziploc baggie and season it with salt & pepper.  Add the beef chunks and shake them to coat.  Make sure you close the bag.  Believe me, if you don't it takes a lot longer to cook dinner.  Sweeping up flour can take quite a while.  Then take the beef out, shake off the extra flour back into the bag, and cook the beef until brown in a large pan heated with 2 tablespoons of oil.  When the beef is brown, add the veggies and stock and don't worry about the thickening step I show here.  Yours will thicken because of the flour on the beef.
     
     
    Ingredients and directions when using left-over meat.


    Cubed, left-over beef or lamb from a roast.  I had about 3 cups of meat. 
    1 onion, cubed
    3 ribs of celery, diced
    1/2 bag of baby carrots, or 2 carrots, diced
    1 package baby mushrooms, I used cremini (baby portabellas)
    2 large cloves of garlic, minced (about 2 spoons of crushed from a jar)
    2 tablespoons tomato paste
    1 can of beef broth (Aldi's had it for $.49)
    1 bottle of beer
    1 teaspoon thyme
    2 tablespoons Worcestershire sauce
    1/4 cup of flour
    salt & pepper to taste

    I didn't add potatoes, but that would have been tasty as well.  My grandfather would have liked turnips.  Whatever your family prefers is fine.

    Add the veggies, beer and beef broth to a large pan and bring it to a boil.


    I let it boil for several minutes to boil off the alcohol.  Then I added the Worcestershire sauce, tomato paste, thyme and salt & pepper.  Cover the pan and let it simmer for about 15 minutes.  This allows the veggies to cook.  Preheat your oven to 400 degrees, Fahrenheit. 

    While the veggies simmer, mix the flour into about 1/2 cup of water.  I have a handy shaker I bought from Tupperware, but you can just put both into a drinking glass and cover the top with foil.  Hold the foil firmly and shake vigorously, until blended. 


     Then pour the mixture slowly into the pot, while stirring.  If you are worried about lumps, you can pour it through a strainer.  My daughter helped with this picture.  I'm not that talented.

     
    Allow the mixture to cook for a couple of minutes, stirring the whole time.  Test the taste and adjust the seasoning.  Pour the whole thing into a baking pan and cover it with the puff pastry.  You can always blop drop biscuits on there, or even the refrigerator ones from a can.  If you have a round pan, try pie crust.    If using puff pastry, which you can buy frozen, brush it with an egg wash.  Just mix a beaten egg with a little water and use a pastry brush or your fingertips to gently apply.  Cut a couple of vents in the top for steam to escape.


    Bake for 20 to 30 minutes, or until golden brown.  I usually put a cookie sheet under pot pies, because they tend to cook over.  Serve and enjoy!!


    Then, because my daughter asked so nicely, I made cream puffs.  They are very easy, and I promise to do them again soon.  I'll show you how easy they are.  I just filled them with chocolate pudding tonight.


    You've got a little drool there.  No, over a bit.  Yep, that's it.